Showing posts with label Tractors. Show all posts

Friday, July 22, 2022

That Youtube Thing, Videos, Action and Stuff Like That

 After I put up a couple videos on youtube, I reviewed them. They were BORING ! Watching someone run an excavator is not nearly as much fun as actually running one. The videos took so much time to watch me flail around the bucket, grab the wrong lever, drop a rock, and dump the bucket in the wrong place, even I stopped them and sighed in disgust.

How the heck do other people get those things to be interesting?

I started looking at heavy equipment videos and tried to get a hint, and one thing stood out glaringly SPEED. See, if you speed up the video, it isn't nearly as visible when you grab the wrong lever and go the wrong way. Speed hides the imperfect and the mistake. Most of the time it even makes it look intentional. Also, putting in stills to show close-ups and examples makes it more interesting because it distracts a bit. 

It seems the key to keeping people awake while watching a video is either cleavage or distractions. People can only watch something for a little while without some change up or excitement. At least it seems that way.

That's why the video I put up in the last post had music and was sped way up. It didn't have stills in it, or other tricks I want to try out. 

I just put up another one to try out some more ideas. This one switches subjects, shows mistakes, and has lots of on-screen text. Voices don't work well when you speed it up, so you have to use that in some way to create interest; I tried that as well.

Can you believe it? I took the chance and bought a new piece of equipment, spent some time learning how to use it a little bit, and then started filming it. What a mess to take on. It's fun learning new things, but this many at once is quite the strain.


Take a look when you have the chance, this is all new to me. 

https://www.youtube.com/watch?v=1eznz2KKoL4&t=120s

Wednesday, July 6, 2022

A Guy I Know Suggested using Youtube

 The title pretty much says it all. I took a camera and recorded using the excavator to do some work on the yard. It took hours and  I encountered the problems we all have with cameras. Soft focus, knocking over the tripod, pointing it the wrong way... You know the drill. 

After hours of recording, I started to respect those Youtube creators even more.

You have to go through the recording, pick the stuff out that makes sense and was actually worth a crap, compose it into something that might be interesting, and then go through the process of putting it online. A whole lot of trouble to convey an idea, but it turned out to be fun.

I see an opportunity here to expand the blog by including other media.

Here's my first effort at this. It's short but represents a heck of a lot of work.


What do you think, is it worth the effort? 

Tuesday, June 21, 2022

So, Have I Actually Done Anything With That Expensive Toy?

Well, yes, but not as much as I would have liked. The 2022 heat wave hit here in Arizona and it was over 110F every day until today. However, today I had to repair my chainsaw instead of working with the excavator.

Sigh....

But I have managed to do some things around the house. I moved a whole lot of rocks out of the way, Built a little road to get around, dug out some brush, and that kind of thing. I know that I'm preaching to the choir here, but tools are great to have. I think I mentioned that I bought it because I was tired of renting equipment and having a multi-hundred dollar bill when I returned it. You can't get good with it only spending a few hours under pressure, and you never quite get the entire job done.

I wanted my own, and indulged myself and bought the darn thing. I don't regret that decision. 

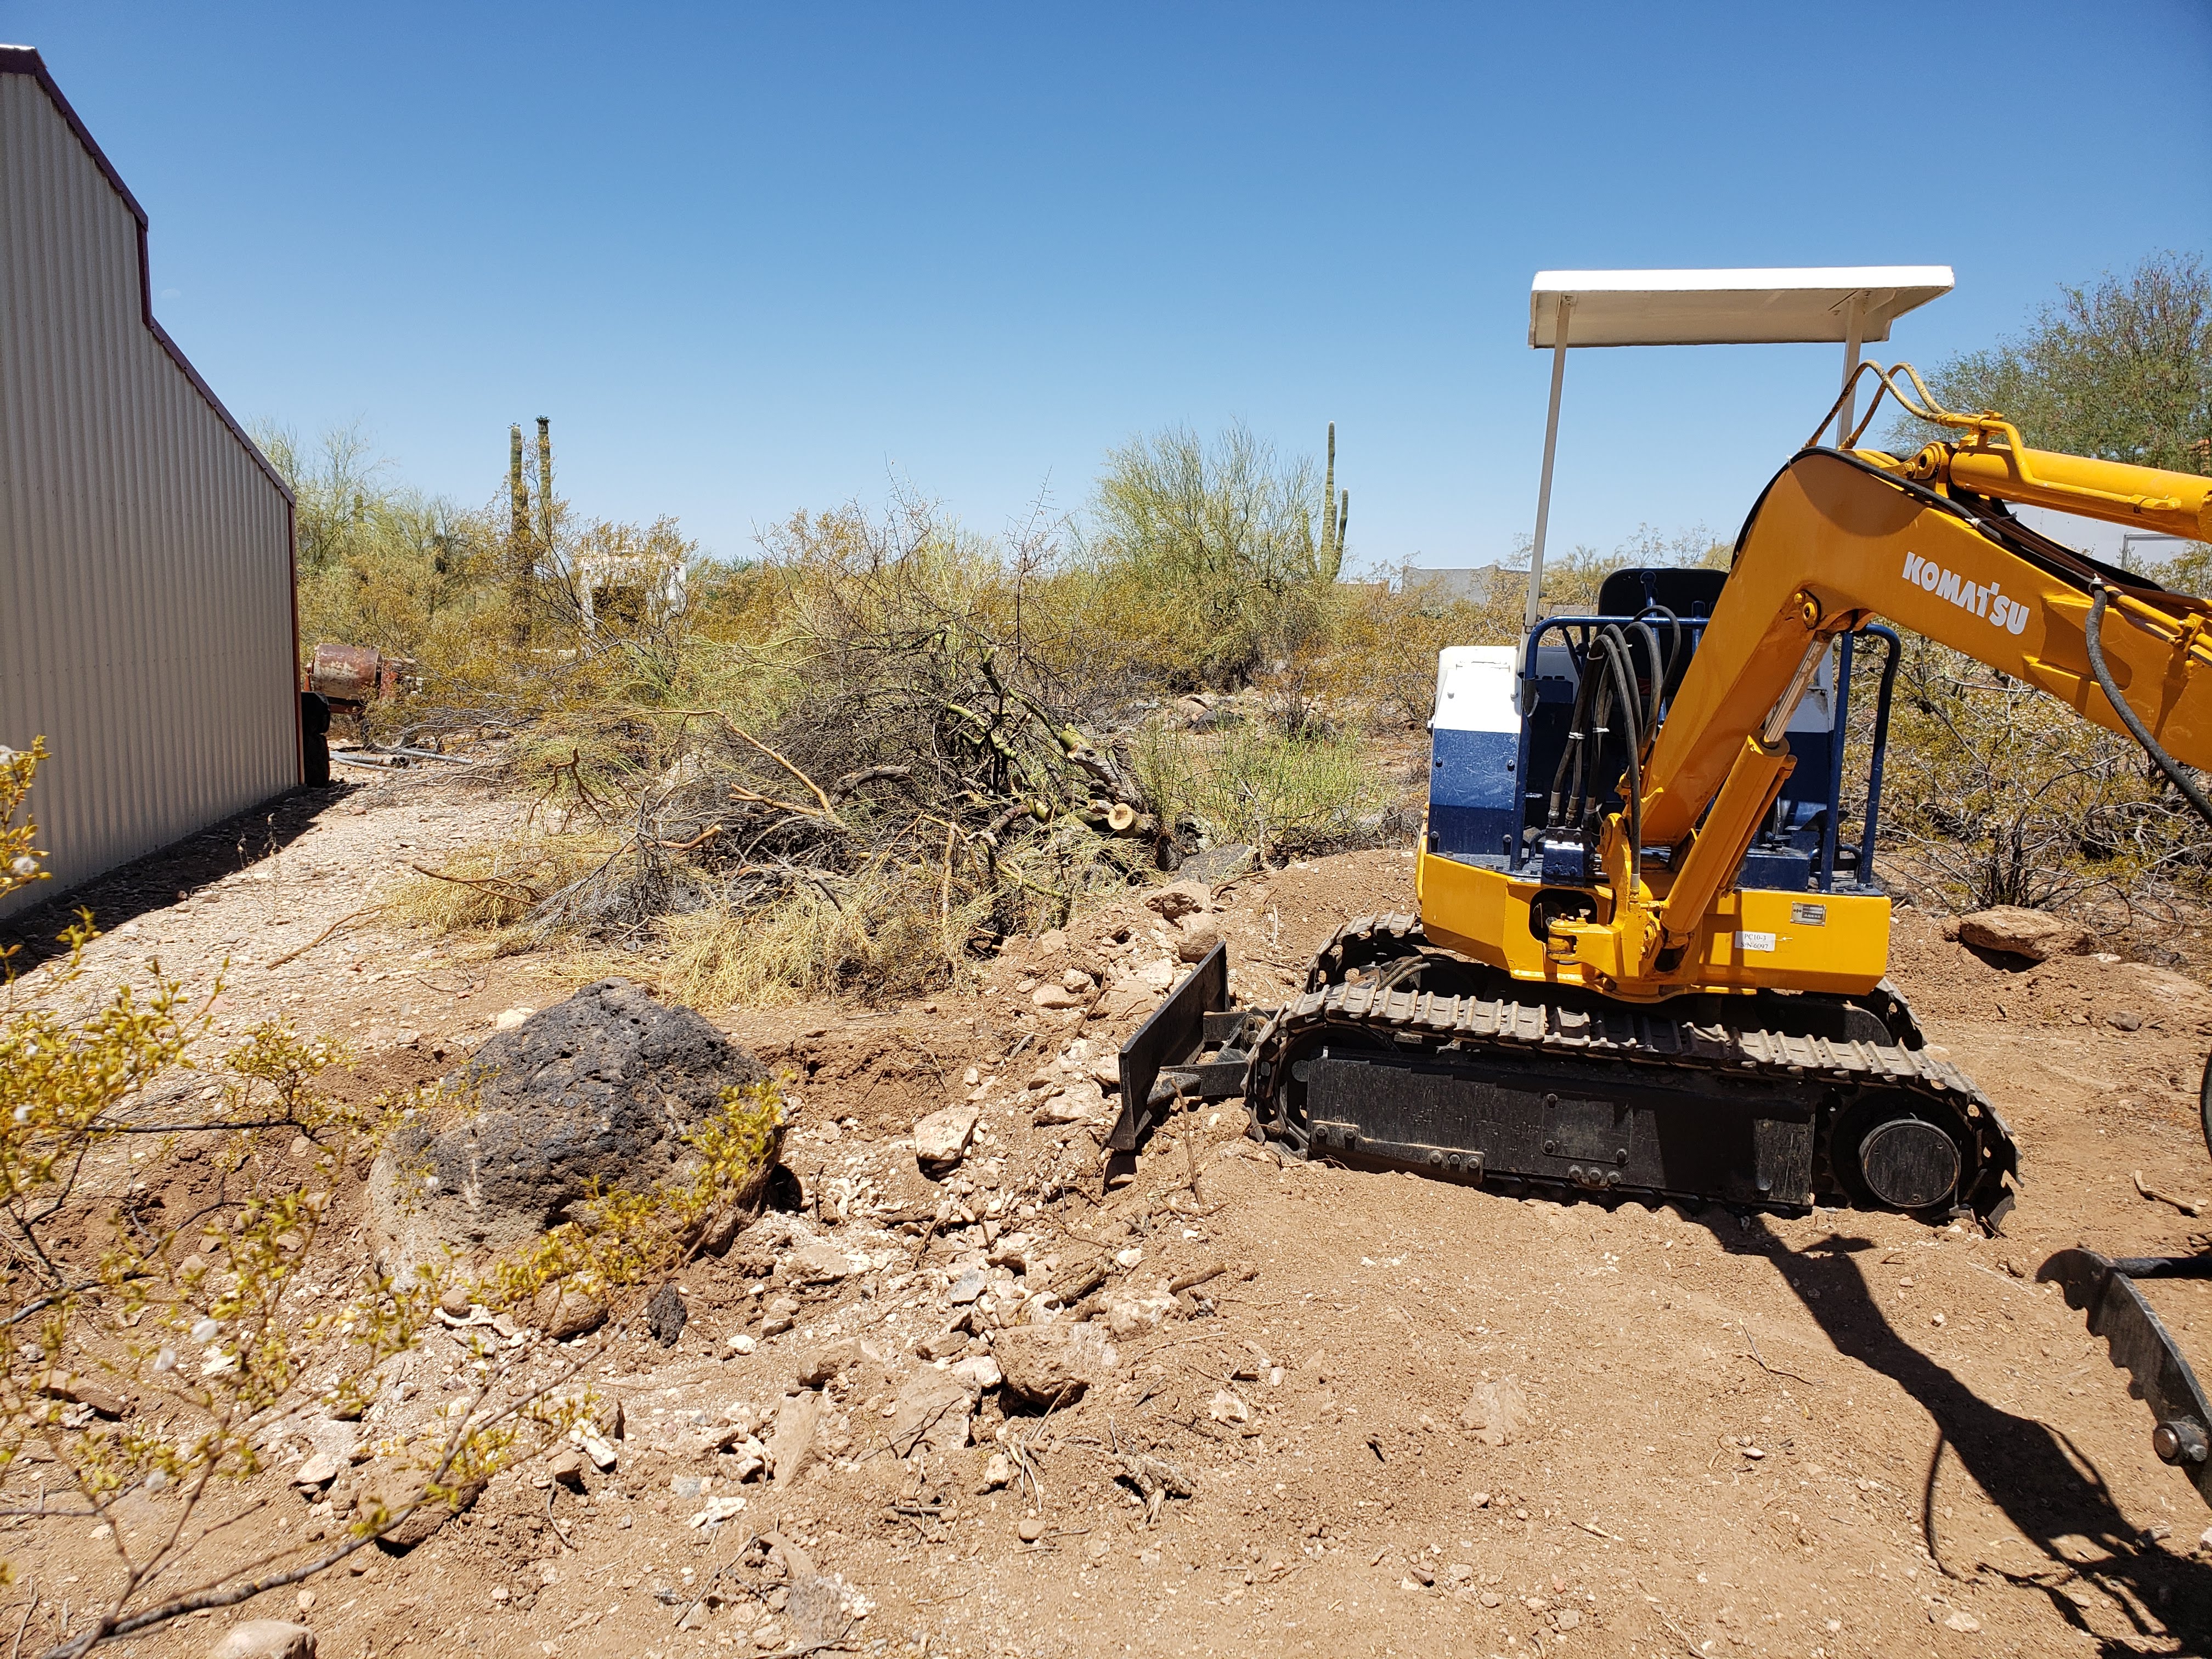
I may be working on this rock for a while. It is stuck in caliche and won't budge.

If you consider following my path, I have a few recommendations:

1. Don't get too big a machine. My Ford tractor is huge and very powerful, but it doesn't fit anywhere. I have to jockey that thing around a LOT to position it for work. Then, when I have to move it, I have to be careful not to take out a fence or something.

2. Excavators are fun and they can pick up heavy things. However, you have to have a thumb to do it easily. You can drag a bucket across the ground and a rock will just slide along avoiding the bucket like it suddenly became sentient and decided not to cooperate. A thumb solves that problem. Thumbs are also really good for picking up brush and moving it. 

There's cactus and thorny mesquite in that bundle !

3. Avoid all the fancy electronic bells and whistles. Sure little short joysticks are fun and cool looking, but the damn things break leaving you with a machine to fix. The electronics on these machines have to be able to take the heat, cold, rain, mud, etc and cost a lot. 

Simple hydraulics are the best for people like me. I want to use the machine, not order parts for hundreds of dollars and wait forever for them to arrive. Hydraulic parts are simple and available all over the place. 

4. Get an older machine. One from the '80s won't have a mess of equipment to lower emissions. A friend of mine had his brand new tractor in the shop for a month to get the emissions equipment working correctly. Avoid that dilemma if at all possible.

Do you really want a DEF reservoir and smog pump ?

5. Diesel may be expensive right now, but it stores well and doesn't explode. Get a diesel engine on your new tool. They run cooler, last a long time, and are already fuel injected. Great little motors that don't plug up with gum from ethanol additives that dissolve gaskets. Remember above where I mentioned having to fix my chainsaw? Yep, the ethanol dissolved the gaskets in the carburetor.

Ethanol is miscible in water. That means it absorbs water
Water damages carburetors. I stole this picture of a really bad one, 
but this CAN happen to you.

6. Educate yourself about the common problems. This is something that you can't get from youtube. People let their machines set outside in the weather and the hoses rot. Hydraulic hoses are not cheap and most of them are custom-made. These things will drive you nuts on a machine that hasn't been used in a long time. If you check back on this blog you'll find where I rebuilt cylinders on the garage floor. It can be done, but that means you're fixing it instead of using it.

For most people, a 4000-pound machine will do everything they want to do with it. It can lift several hundred pounds and move it around. Trailers are cheaper for them. I picked up a used tandem trailer that will carry it just fine locally without any trouble. 

Unfortunately, they can be a black hole for money. There are attachments that can make everything easier, but they cost big bucks. A grooming bucket that lets the dirt go through while the bigger rocks get stuck is great for clearing rocks, but they cost hundreds. Consider digging a hole and scraping the rocks into it with the claws instead. A quick-connect so you can change the buckets easily is great to have, but have you looked at how much they cost? You can pound a different bucket in place for a lot less money. A smaller or larger bucket is great to have, but unless you find one abandoned in an empty field, it's gonna cost you a bunch. Sure you can build one and that would be fun, but have you looked at the price of quarter-inch steel lately? Welders are getting cheaper, but steel isn't. 

I love my excavator and it has made things possible that simply weren't before, but I must discipline myself constantly to keep the urge for a new item for it under control. 

For me, being able to climb up on it anytime I want to and tear out a cactus is exhilarating. Not having to reserve it at an equipment rental place and picking it up at 7:00 AM from a clerk that hasn't had enough coffee is worth a lot. Let's not talk about getting it back on time. That really sucks.

Of course, my yard is starting to look like a used farm equipment lot !


I think it looks great though !


Tuesday, April 5, 2022

My New Excavator

 Yes, I bit the bullet and bought a Mini Excavator. 


I looked at what was available locally for a couple of months, and what I found just didn't cut it. The hoses had rotted from the sun, There was significant damage to some areas, they were way, way overpriced; at least in my opinion. So, I bit the bullet and expanded my search online to nationwide.

There were a lot of them out there, but buying something this expensive sight unseen was scary. Sure, people do it every day at online auctions and such, but they know what they're doing, ... I don't.

So, I went to ebay and looked at their guarantee for construction equipment. They insure the purchase up to $100,000, and that gave me enough courage to contact a seller. The rest was easy. The excavator arrived in port in Long Beach, CA; was inspected; loaded on a truck, and showed up at my house in just a few days total time. I was lucky in that respect, but I did choose a machine that was available instead of looking for exactly the right thing.

If you want to know the specs, the model number is right on the side and google can pop up a spec sheet in one search. What I like most about it is there ARE NO ELECTRONICS; it's old school hydraulics with valves and such. It can be worked on without a laptop plugged into a data port. Less failures to some component getting wet and less expensive control components.

I can fix it if I need to. (or should I say 'when')

Now the bad stuff: When I got on it, having exactly zero experience on an excavator, I couldn't get it to go. Meaning, how the heck do you run this thing? I fiddled around and found the two forward controls for the tracks and managed to move it down the drive a ways. Then I looked at the control layout decal and managed to work it a bit. I got it from the road to my house in a few minutes and then started to play with it where no one could see me make a fool of myself.

After an hour of trying levers, looking at the instructions (shudder) and messing around I managed to make it do things. Then, I went nuts. Spinning around using zero turn, swiveling it around and around, banging the bucket on the ground. Basically playing with my new toy. 

It is so exciting to pick up a bucket of dirt, swivel around and dump it behind you. That is probably the most exciting thing about an excavator I've tried yet. It can really dig!! I can make a hole in no time, even with the incredibly rocky ground I live on. Just wiggle the bucket back and forth a little and it will bite in. Really large rocks give it trouble, and I have to plan better to roll them out of the hole, but so far, I haven't hit one that I can't move. I know I will at some point (it is a mini machine), but then I'll just go around the rock if necessary. 

And, it has a THUMB. In case you don't know what that is, here's a picture of mine.


This allows me to pick up rocks, grab a bunch of prunings, pick up a limb to chainsaw, etc. It gives me a hand to manipulate things with. This increases the versatility of the machine to a level that we, as homeowners, can really appreciate.

There is one annoying thing about it though. The left hand control is set up counter-intuitively. Left hand left is stick away and left hand right is stick close. Left hand forward is swing right and left hand back is swing left. There are two control standards in the US, ISO and SAE; they differ in the positions of the controls, however both of them have the swivel control on the left hand side to side.  That is driving me nuts. I keep swinging the excavator when I try to move the stick. It just makes sense to my brain that swivel left should be push left, not pull back.

Yes, it can be changed by moving the hydraulic lines. However, the lines are plumbed, not hoses. Take a look:


Those two pipes are the stick controls, and I didn't want to spend a week creating new ones to fit the application. Note that steel plumbing is a good thing, it protects the hydraulics and makes for a really good connection, They are just really hard to move around. I may come back to this after a while and change it, but reprogramming my brain is easier at this point and it keeps the machine on the dirt doing what I need instead of sitting in the garage waiting for parts.

What's also awesome about this machine is how well it is set up. I can get to the controls really easily, the gas gauge is a clear tube instead of a float in the tank that fails, the horn is not where you'll hit it every time you use the machine. It even has a light that I plan on using very, very little. 

For example, the horn used to be on the right hand control where you manipulate the bucket and bang your knee. It's now on the right hand side where the other electrical controls are:


I may grind that mount off at some point, but want to have a can of Komatsu blue paint on hand when I do to keep it pretty.

Wanna see the extremely high tech fuel gauge? I guarantee this will not fail due to a rat eating the wiring or some connection coming loose.


Yes, it's just a clear tube that shows the level of fuel in the tank. No electronics, no silly idiot light, just something that you can easily see that won't fail as soon as you need it.

Now for a blatant recommendation of the seller I used for this transaction, NGO Company. I called them about the excavator I found both on the web and ebay. I talked to a guy named Ray, and he was totally honest. He described the machine, the process of buying it and when he expected it to show up in port. I waited a day, and called him back to start the purchase process. I paid a deposit, then waited until the machine was in his shop. He sent me pictures of it and I paid the rest by wire transfer. 

As soon as the wire showed up as pending for transfer, he called the shipper and they came and loaded it up. I got it the next day. 

Totally seamless transaction; nothing went wrong and the machine started on the first try. How good can it get?

Ray will probably read this blog post and snicker a bit because I literally drove him nuts with questions about the dates, how wire transfers worked, etc. All the stuff a naive purchasers comes up with. I was basically a total dweeb, and he put up with it.

If you're interested in something like this, visit his web site at https://www.ngollc.com/ and tell him Dave sent you. You won't get a discount, large equipment doesn't work that way, but he'll recognize the name.

I'll be posting about my exploits with this machine in the future. It's too much fun not to spend time on it. 


Sunday, December 30, 2018

Have You Ever Thought About Tire Inflation?

Well, neither had I. At least not much more than topping of a tire once in a while. However, I got new rear tires on my big tractor and after a while of just sitting, one of the tires was very low. Getting the new tires was an interesting experience. Those things weight a lot and I didn't want to spend hours trying to break the bead and leverage the tire off using long tire irons, so I just called in a mobile tire service and let them do it for me.

They came out in a big truck with a crane installed in the middle of it. They didn't even have to remove the wheels from the tractor; they simply pulled the tires off of it and put the new ones on. I sat in a lawn chair and watched. That's the 21st century way to get tractor tires changed.


Anyway, the brand new tire was flat and I had to air it up. I grabbed my trusty tire inflator and about ten minutes later I was still messing with it. I have a pretty good compressor, but putting air in a tire as big as the ones on my tractor through a hole a little more than an eighth of an inch was going to take some time. Plus, holding it up to the valve stem was getting tiring. You all must have either owned or used one of these over the years:


I had another one to try out that I picked up at Tractor Supply a few months back, so I gave it a try and it didn't work much better.


The little assembly that was supposed to hold the hose on the valve either leaked or popped off each time I tried to use it.  I did eventually get it to fill the tire, but it was an experience that I didn't want to repeat.

Off to Amazon I went and found an inflator that had many good reviews and looked like it could do the job because it was substantially better made than the one I had. There were rave reviews that indicated that it would tell me the tire pressure as I filled the tire, it filled fast, was accurate, all the hype one should have learned to expect and disregard. I ordered it. When it came in, I drove the tractor (with a flat naturally) in front of the garage and tried the new device out.

Although the clip on part that should hold it to the tire worked better, it leaked if moved even a little bit in any direction. Since the valve stem was on the inside of the wheel that meant I had to lean over the tire and hold it in place. All was not lost though, it had a screw on fitting that could actually be put on the valve and would allow me to relax a little bit while filling the tire. But I couldn't figure out how to hook it to the inflator hose.

I used this inflator to fill the tire, but it wasn't a very satisfactory experience since, even though the clip on was better, I still had to make sure it stayed straight on the tire.


I went looking for another one based on about $40 spent so far and several hours direct experience and ordered this one.


It had exactly the same valve assembly as the last one with exactly the same screw on adapter, but this one had a hose that I could use the screw on with. I installed the 'hands free' adapter and hooked it up. No leaks and I didn't have to hold the hose totally straight to use it. The problem with this one was the same as all the others I had to lean over the tire to hold the stupid lever that released the air.

Fishing around my drawers of junk I found a piece of velcro (you can see it above) that I could wrap around the valve to hold it open so the tire would fill unattended. I was totally set up now. I could attach the fitting, fill the tire while checking fluids and such, then put everything away for later. Of course the eventual goal was to get the leak fixed, but I hadn't been able to find where it was.

I did notice a few things I want to share about these simple devices that don't work as well as they should. First, these days it's actually getting harder to find inflators that aren't digital. They all tout how wonderful they are because they are 'easy to read'. That is a simple lie not only will the batteries be dead when you need it, you can only see the numbers when they are oriented correctly. And, who the heck cares about a half pound resolution in a tire's pressure? As soon as you disconnect the device and the air warms up a bit whatever reading you had will change. My bet is that the accuracy is around ten percent or so and a digital reading just isn't necessary. It will also save you time, money and frustration with an old fashioned analog gauge.

None of them read the pressure of the tire, they all read the hose pressure. Think about it, it's a hose transferring air, the only pressure it actually can read is the pressure in the hose. That's neither the compressor pressure nor the tire pressure. This all means that you have to stop the flow of air to actually get a reading. I checked it every couple minutes (yes minutes) to see how it was going. Usually, I over inflated it and had to drop it down to the right pressure by hand, but that didn't take too long.

The high end devices cost from $25 up to over a hundred and they're all basically the exact same device with different names stuck on the outside. Take a look:


Lastly, don't believe the comments and advertising. If you have big tanks or tires to fill, get a screw on adapter and use it. It won't speed things up much, but you won't be holding the hose a certain way to keep it working while having to hold the lever down.

Heck, the first inflator I tried that had been my buddy for years and years would have worked with the adapter and I would have saved roughly fifty bucks and weeks of frustration.

Oh, I finally did find the leak. After washing the tire down six times with soapy water and turning it slowly in the sun and finding nothing, I was under the tractor working on a simple drain valve and happened to think that I hadn't checked the valve on the tire. The valves on the tractor are all on the inside to prevent rocks from ripping them off and they are a bit hard to check. Sure enough, the valve was not tight in the wheel and leaked. A few minutes with some soapy water and a wrench and the problem was fixed.

So, learn from my mistakes.

Thursday, March 29, 2018

Valve

A while back I posted about the front loader valve on my big tractor, then forgot to post an update <link>. Well, after several screw ups and two separate orders for new hoses and such, I got it installed on the tractor.


Looks good doesn't it?  I had to cut off the old mounting arrangement entirely since there wasn't enough room for the new valve in the existing one. Then I had to get some 1/4 inch plate steel and bend it to wrap around as shown above. This gave me a place to mount the valve itself. Here's the old mounting arrangement:


Compared with the new:


That was an interesting project in itself; mainly because I'm not a welder, I just make stabs at it from time to time. That mounting plate was cut with a plasma cutter and then I bent it by cutting some lines about half way through the plate and bending it over in a vise. I stitch welded the cuts to make them hold. The entire plate was welded on the side of the front loader pillar so it would be in approximately the same place as the old one.


The old valve was plumbed with steel tubing and some of them wouldn't fit the new valve, so I got some hydraulic hoses from an on-line vendor and connected it that way.


My return line is the one on the bottom; that leads to a new fitting I put on the fluid tank.


You can just barely see the fitting under the mount on the side of the pillar. On this tractor they used the frame of the loader as the reserve fluid tank, so I couldn't drill any holes for bolts and such. It all had to be welded. Here's a better view of the return line:


That was another new experience, welding with a MIG loaded with flux core wire in the desert winds. Try fitting your head in there with a welding helmet around it. I have a couple of new scars to brag about.

After fixing a couple of leaks and crossing my fingers, it worked first try. I used the tractor to move some stuff around and the new valve was great. I probably have the only 3000 series Ford tractor with a joystick. Other folk have thought about it, but I haven't read about anyone actually doing it.

Aren't tractors fun?


Tuesday, June 27, 2017

Tractor Hydraulics - Cylinders

I'm still waiting on my valve assembly, but I thought I would write a bit about repairing the cylinders on the tractor. The cylinders are what do the real work of lifting and moving things. The engine turns a hydraulic pump and that shoves high pressure oil down a series of tubes and hoses to extend or retract a rod. The rod is attached to whatever thing on the tractor you want to manipulate.


This is a picture of the tractor with red arrows pointing to the various cylinders visible on one side. These things are awesome; using the power of fluid at high pressure, they can manipulate the various parts around pivots to lift, dig, dump, etc.

They're also the thing that many people won't even attempt to fix themselves. While they will eagerly take on rebuilding an engine, they'll send a cylinder to the shop for someone else to disassemble and fix. This option could be justified if the rod is bent or something actually broke inside, but most of the time it can be repaired on a table in the garage using tools some of us already have, or can borrow. So far, I've rebuilt seven of these things and all of them work fine. No leaks.

First, let's talk about hydraulic shops. There are some really good ones out there that have excellent people doing great work, then there are the shops that I seem to find. There's one guy that is really good and a bunch that can't buckle their own belt. Guess which one usually deals with me? And, these places are expensive. A friend of mine had three cylinders done by Case; it cost him just a little less than $3000. This is under the price of replacement Case cylinders, so it was a better deal than buying new, but sheesh, that would make many folk abandon the tractor. What they did to me was say $300 to $400, but there may be problems, and that will raise the cost. Additionally, I have to take the cylinder off and get it to their shop.

So, they get the cylinder, take it apart and find a 'problem' that cost more than I can afford. I'm left with a cylinder that has most of the parts in a box, and a disabled tractor. No, I'll pull it apart and see what needs to be done. If it needs major work, I'll find a machine shop to do the work, or hunt for a replacement cylinder somewhere.

I'm not going to go into great detail describing how to work on one of these things, there's videos on youtube that cover it for the most part. Additionally, there's the perfect thread for someone attempting this for the first time over at tractorbynet.com <link>. Instead I'm going to tell you the things that you don't get from the videos and various web sites. There are just some things that they don't mention that I had to find out the hard way.

The single biggest complaint that folk have is that the cylinder leaks. It will leak inside, which causes the cylinder to change positions over time, and it can leak externally which also allows the cylinder to change position, but this time it gets hydraulic fluid all over the place. Both of these problems are fixed the same way, replace the various seals and o-rings in it and put it back in service.

If it's that simple, why don't more people do it themselves and save money? Some of these things are big, heavy, and all the fittings are stuck. You can't just grab a crescent wrench off the table and turn a couple of bolts to get them apart. And, to make it a little more complex, most of them require special wrenches. Here's the ones I had to buy to work on mine:


The two black ones, not the open end next to them.

It takes a LOT of force to open one of these cylinders, so a piece of pipe to use as a cheater bar is necessary to break some things loose. I used a three foot pipe that fits over the various wrenches I used. Let's take a look at what's inside one of these:


I know, it's a bit hard to see, but I wasn't thinking about posting it when I took this picture. Here's a parts diagram of one of my cylinders; they are all basically the same:


Part number 1 is the long silver rod in the picture above. 4 is the external oil seal. 6 - 8 are what's called the 'gland' and they go on the rod, but at the end near the rod mounting pin 3. 9-13 are the piston.

So, assembled the pieces look like the photo above. This is what you'll see when you finally get it out. But first you have to overcome the gland and external oil seal.

My tractor had two styles of glands. The one in the diagram above that is simply tapped into place and another that is threaded and you screw into place. Let's talk about disassembling the tap in one first.

It's really easy to put these things in, but not so when you try to take it out. First you have to unscrew the external oil seal. I talk about this process below. Then the press-in gland removal instructions I found said to drain the cylinder of fluid, then repeatedly tap the piston against the gland by shoving the rod in and then pulling it out, slamming it against the gland until it comes out of the cylinder. That didn't work at all. First, you simply can't get all the fluid out and each time you pull the rod, it hits the fluid inside and stops before hitting the gland. Also, the fluid sprays out one of the fittings and makes a mess.

How did I get it out? First, I unscrewed the external oil seal on the end before disconnecting the end nearest the bucket (more detail below). Then I set it up like this:


Yep, I pulled the Jeep in front of the tractor and hooked the wench up to it. This worked pretty well on all of them but one. That one was really stuck, and I actually pulled the jeep across the ground without getting the piston to come out. To make that sucker give up, I had to get inside the jeep and stand on the brakes so the front wheels weren't turning and run the wench. The two rear wheels weren't enough friction to make it happen. This is the gland, rod and piston from that cylinder:


There's two things that are important. The yellow and rust thing on the right is the external oil seal that holds stuff in, and it is hard to get loose. I used the wrench shown above and a three foot cheater pipe, and still had to hit it with a two pound hammer a couple of times to get it free. Some people use a pipe wrench, and that will work too, but it's really hard to keep the pipe wrench on while applying pressure. You have to get a neighbor to hold the pipe wrench in place while you stand on it and jump up and down. No, a longer wrench won't help; it's just harder to control. If you go the pipe wrench path, be careful not to crush the oil seal. This bugger is easier to break than you might think having just pounded on it with a hammer, but read on.

The other thing is the silver nut on the left. These things are put on with several hundred pounds of torque and are over an inch across. I used an 18 inch crescent wrench with the cheater pipe to free it. But, how did I hold it in place while applying that much pressure? That was easy, just put the rod back on the tractor but not in the cylinder. Then, using the entire tractor as your vise, go for it using the cheater bar to break it loose.

Be careful if you decide to use heat on this nut. It's one of these:


It would be really easy to melt the material inside the nut that helps keep it in place during use, and these nuts are expensive.

That brings up the question of how to torque this thing back on. What I did was to use the cheater bar and crank it down as tight as I could after putting a couple of  SMALL spots of RED Loctite on the threads. They've held well for quite a while now. Same thing with the external oil seal, but don't use a cheater bar on this. Just put the spots of Loctite on the threads then snug it down tight using a wrench. I'll tell you why not to use a cheater bar on it below. Lots of folk will disagree with me on the red Loctite because it's meant to be permanent. You normally have to heat it up to around 400F to get it to let go. However, with the invention of impact drivers and wrenches, mechanics found out that sharp impacts will fracture the bond and let you remove it. Since you'll probably have to hit it with a hammer anyway, that should be enough. Also, nitromethane solvent will soften the Loctite, but that might take several hours. Yes, I had to go through this process and I'll write about that below.

Now for the other kind of cylinder assembly where the gland is screwed in. These are usually larger cylinders that are much heavier and will take some leverage to move around. Sorry, I don't have a good picture of this, the camera wouldn't focus well enough. Here's the rod, gland and piston from one of those cylinders.


Here's what the outside end of it looks like:


The end is actually two pieces; one that screws directly into the cylinder and the other that screws into the first piece. The external oil seal is the bottom piece, it has a seal in the end to keep dust collected on the rod from getting inside as well as a couple of o-rings inside to hold back whatever oil may get to it. The upper one is the actual gland and has packing inside that the oil seal helps keep in place. Both of them are hard to remove, but the external seal is the easiest. The gland was really hard. If you look closely you'll see burn marks where I heated it up to get it loose. I took an acetylene torch and ran it around the outside until I was able to turn it with a wrench and the cheater bar.

The end nut that holds the piston together was not as hard as I expected, I only needed the cheater bar to get it to move.

The reassembly after replacing all the o-rings and seals was pretty easy, but I managed to mess it up. When I put the external seal in place I over-tightened it and broke it:


This was the first cylinder I rebuilt, so I have something of an excuse. I thought that since it was so hard to get off that it should be torqued down and it just crumbled.

Turns out that these are often made from cast iron, not steel. The cast iron just couldn't handle it. Man, was it hard to remove. It was as tight as it could be and had red locktite on it. When I went to replace it I used a chisel and pounded it pretty hard for a while; it finally gave up and turned a little bit. I got a replacement for just a shade under $100. Total rip off, but I couldn't find a used one anywhere.

Now, let's consider the replacement seals. If you go to a dealer, they'll sell you a kit that has the necessary seals and such in it to replace everything. I actually found seal kits for this tractor, but ... $200 for some o-rings?? There had to be a better way. Calling around the various places that serviced hydraulic systems was worthless, they all wanted to sell me the expensive kits or do the job for me. I finally talked to a guy that suggested going to a store that specialized in this kind of thing. I got a hint from the parts guy at a local AutoZone, Martin Fluid Power.

I found Martin Fluid Power on the web and they had a store in town, so I loaded up the first cylinder and went there prepared to show them exactly what I needed. They were great. The guy measured each spot where a seal was supposed to go and gathered up the parts right there in front of me. I took my bag of stuff that cost $25 and went home with it. I just saved myself $175 a cylinder.

What was there originally for packing was called a Vee Pack. This is a specially shaped seal that you combine a number of to fill the space. The orientation of these is important. There are two kinds of basic cylinders: single action and double action. Single action only push one way, they are returned by springs or the weight of what they are moving. Common examples are a floor jacks or the jacks under motor homes. Double action get fluid pressure on both ends to move it in or out. Most cylinders on tractors are double action. The only exception I know of are the swing cylinders on some backhoes, they use two single action cylinder in opposition to swing that big boom around. The Vee Packs are arranged differently in the two types. Here's a picture of mine to supplement the ones in the thread I recommended up top:


See the shape? If you were to cross-section them they would look like a 'V', hence the name Vee Pack. You basically point the open side toward the fluid pressure so they expand a tiny bit and hold back the fluid. What makes it a 'pack' is that it consists of several of these with a special spacer in the middle; some of them point one way and the rest point the other. Out there on the web are some illustrations of this and how they hold back the fluid and move the piston back and forth in the cylinder.

Naturally, being me, I didn't replace them with a normal Vee Pack. I used what they called a Poly Pack. These are high tech materials that work the same way, but survive much much longer. You almost never see Poly Packs on tractors, but for a tiny bit more money, they should last until the tractor wears me out. They look like this:


They have the same action of expanding one edge a tiny bit under pressure to fully seal the cylinder, but the different shape and extra spacer piece in the middle work to decrease friction and wear. The material also helps with friction and keeps the temperature down during use. They work the same, buy enough of them that fit the particular cylinder and fill the space; put half of them facing one way and the other half facing the other. When you lay them out remember the wide end faces the incoming fluid.

I used these on the pistons as well as the interior of the external oil seals. They just work with no hassle at all. Getting the right size may be a tiny hassle, but a good parts man can help with that.

Lastly, a couple of suggestions for doing this. Take a LOT of pictures; this isn't the good old days when you had to have film developed. I didn't take enough, and when I put back one of the cylinders, I messed it up. Here's a picture of the installation showing the hydraulic hose:


Don't see the problem? Let's look a little closer:


Most of you see the problem, but for the ones that haven't messed with a tractor, the answer is, I got the cylinder in upside down. When the cylinder pivots up it will crush the connector. Guess what:


It did. If I had taken a before picture and then actually looked at it, I would not have had to order a new hose. That brings up another point hydraulic hoses.

Hydraulic hoses cost way too much. Well, that is if you go to the places that various folk recommend. There's a place here in Phoenix that everyone touts as being THE place to go for hydraulic hoses. I went there for the first couple of hoses and paid out the nose for them. The next set I went to AutoZone and got them. Frankly, if you don't live in a farming community, AutoZone is a pain because they don't understand pressure and flow well enough to put the hoses together. I talked the parts guy through it and got what I needed, but there's an even better way: go online. There's several places that sell hydraulic hoses online that have great customer service. You call them up describe what you need, maybe send them a picture or two, and they will put together exactly what you need. And, the price is fair.

I don't know if you noticed or not, every single place that I went to wanted to charge me several times what the stuff was actually worth. I fully expect to pay retail, but two hundred dollar seals, undefined labor rates that are under their control, triple the price hoses (or more) just isn't what I want to do. Look online for the stuff, the wait of a few days may save you hundreds of dollars and make an impossible project possible.

And,

When you pry the various things apart and scrape the crud out of the various grooves, be careful with the darn screwdriver:


The rods are heavy and covered with a film of hydraulic fluid. When you handle them, wear gloves that increase the friction between your hands and the rods. This will offer some protection and lessen the chance of dropping it on something soft:


Have fun.

Sunday, June 25, 2017

Speaking of Tractor Hydraulics ...

A while back I bought an old, big tractor. I already had a small landscape tractor, but I wanted to be able to dig in this rocky soil and the little one just wouldn't cut it <link>. This big guy had been poorly maintained for many years out here in the Arizona sun and has been a constant pleasure for me to mess with.

But, wait, how can a poorly maintained tractor be a pleasure? In case you haven't noticed, I like to fix things; especially things that I know little or nothing about. I get to dive in, take it apart, figure out how it works, and eventually, actually use it for whatever purpose it was intended. This tractor has been a great project machine for the last couple of years and has been running (well mostly) the entire time. It's dug holes for me, the neighbors and a friend down the road; it also moves dirt for folk that managed to get a pile of it delivered to start a garden. Fun machine.

The valves for the front loader have been leaking the entire time, but hydraulic fluid is much less expensive than the $1800 valve assembly, so I just lived with the leak until about two weeks ago. I had several choices, replace the valve, fix the valve or install a different valve. Each choice, naturally, had its own shortcomings:

If I replace it, I'd have to shell out $1800 plus shipping for a new one. There are a few used ones that show up from time to time on ebay, but who knows their history? I'd have a new valve and it wouldn't leak.

I could send it to a hydraulics shop. I called a couple of hydraulic shops and the estimates ran from $700 to $1000 with the caveat that they might have to custom machine some parts that weren't available. That, of course would drive the price up. The up side is that it wouldn't leak.

Replacing it with a different kind of valve would require some modifications to the tractor and special fittings would have to be put in place. This was the cheapest solution in raw money, but would take some plumbing and fabrication time.

I decided to pull the valve loose from the tractor and see how bad it would be working on it. The hydraulics were weird compared to other tractors of the same era and the valve assembly was a lot larger than I initially thought. I just put it back on the tractor thinking I would decide later (after a couple of quarts of hydraulic fluid) which route I would pursue.

But (there's that word again), after putting it back, the front bucket wouldn't hold position. I noticed it throwing away a pile of weeds. I put the bucket about a foot off the ground in the up position and went to get a wagon load of weeds. When I got back, the bucket had rotated down.

After rotating the bucket up again, I put the weeds in the bucket and went to get another wagon full; when I got back, the weeds were on the ground and the bucket was down again. Taking it for a test drive, I found out that I had to rotate it back up every few minutes or it would wind up facing the ground. The arms worked fine, it was just the bucket that was trouble.

My trouble shooting skills kicked in and told me that messing with the valve put it over the edge and it was time to make one of the decisions above, so I decided to rebuild it myself instead of taking it to a hydraulics shop. Yep, that was choice number four that I hadn't thought of before.

Out came the big tools and cheater bar, and about an hour later I had the valve free from the tractor. The idea was to pull it apart, replace the various o-rings and put it back. So much for plans.

Here's a top view of the valve assembly:


The two handles are for the loader lift and the bucket tilt. From the back side, it looks like this:


People familiar with tractors might notice a couple of things. There are the usual 'work' ports, two each for the loader up down and bucket rotation cylinders and an input port for the fluid. What isn't there is the output port to return the fluid back to the system. That can be explained by this picture of the mounting plate after the valve was removed:


See the hole in the middle of the picture? It's the relatively clean black spot. That's the return line; they actually fed the fluid through the mounting plate to a pipe that leads to the frame of the loader where the reservoir is. This has the advantage that it will not rot in the sun and the disadvantage of making the valve almost impossible to replace with something else. Probably wanted to ensure the sale of parts later.

Here's the valve after I got it out:


I carried it inside the garage and started taking it apart. But before I show you the guts of the thing, I want you to notice the fitting on the very lowest part of the valve body in the picture. Doesn't that look like a galvanized pipe fitting? It was. Here's another view of it while it was still on the tractor:


I knew this wasn't supposed to be there, but didn't really understand what the problems might be. Notice the wet fittings from the leak; I have to keep in mind what the actual problem was I was trying to fix.


These are the two 'spools' that are the actual moving parts inside the valve body. The cylindrical cuts in them allow hydraulic fluid to move to the inputs on the cylinders depending on where you have the control levers positioned. The galvanized fitting is right there at the bottom of the spool on the right. I hunted down a parts diagram of the valve assembly to see what was supposed to be there:


I wrapped a red rectangle around parts that were missing. What happened was that the end cap (20 on the drawing above) was taken off and probably lost. The other parts (17-19) probably went with it, so they sealed that part of the valve body with a kludge of galvanized pipe fittings. Naturally, pipe threads didn't match the threads of the valve it was a little bit too small, so someone wrapped the fitting with about three yards of teflon tape and screwed it in that way.

This was the cause of the bucket rotating down on its own. When I took the valve off the first time I probably bumped the fitting and it moved enough to cause a small fluid flow, just enough to cause the bucket to move slowly. When I messed with it the second time the already deteriorating teflon tape turned into slime and just came apart. Its that pile of stringy looking stuff in the spool picture above. Here's a closer look:


I also found my leak:


I used a flashlight to give you a better view. That hole in there is where the seal for the top of the valve should be. That little pile of black debris down below it is what was left of the seal. All the top seals were that way, brittle powder. It's actually a wonder that the leak wasn't much worse.

So, there I was. The valve had over 200 bucks worth of missing parts and a bunch of cheap seals and o-rings that needed to be replaced. Roughly a couple of weeks wait for delivery and a few hours of work.

Naturally, I decided to take a totally different approach. I ordered one of these:


This is a 24 gallon per minute, double spool valve assembly. Brand new, latest technology and a JOY STICK ! For some work in re-plumbing and mounting this, I'll have the latest in loader control. Yes, it'll cost me about $100 more to do it, but this is just another project to have fun with.

Now, I'm pacing the floor waiting for it to arrive.

Edit: I got it in and installed it, then forgot to follow up on the blog. Here's the finish of this project <link>.